A Complete Guide to Setup GCP for GAS: Guide 003
Introduction
If you are looking for a guide to connect your Google Apps Script project with a Google Cloud Project for some advanced features. For example, publish your project as an add-on in the Google Workspace Market Store, or to enable some Google API Services which are currently not available in Google Apps Script like the Google Blogger API. You can follow this guide.
Instructions (14 Steps)
Follow the steps below to set for your Google Apps Script project.
Step 1
Create a new Google Cloud Project by visiting the link below.
https://console.cloud.google.com/projectcreate
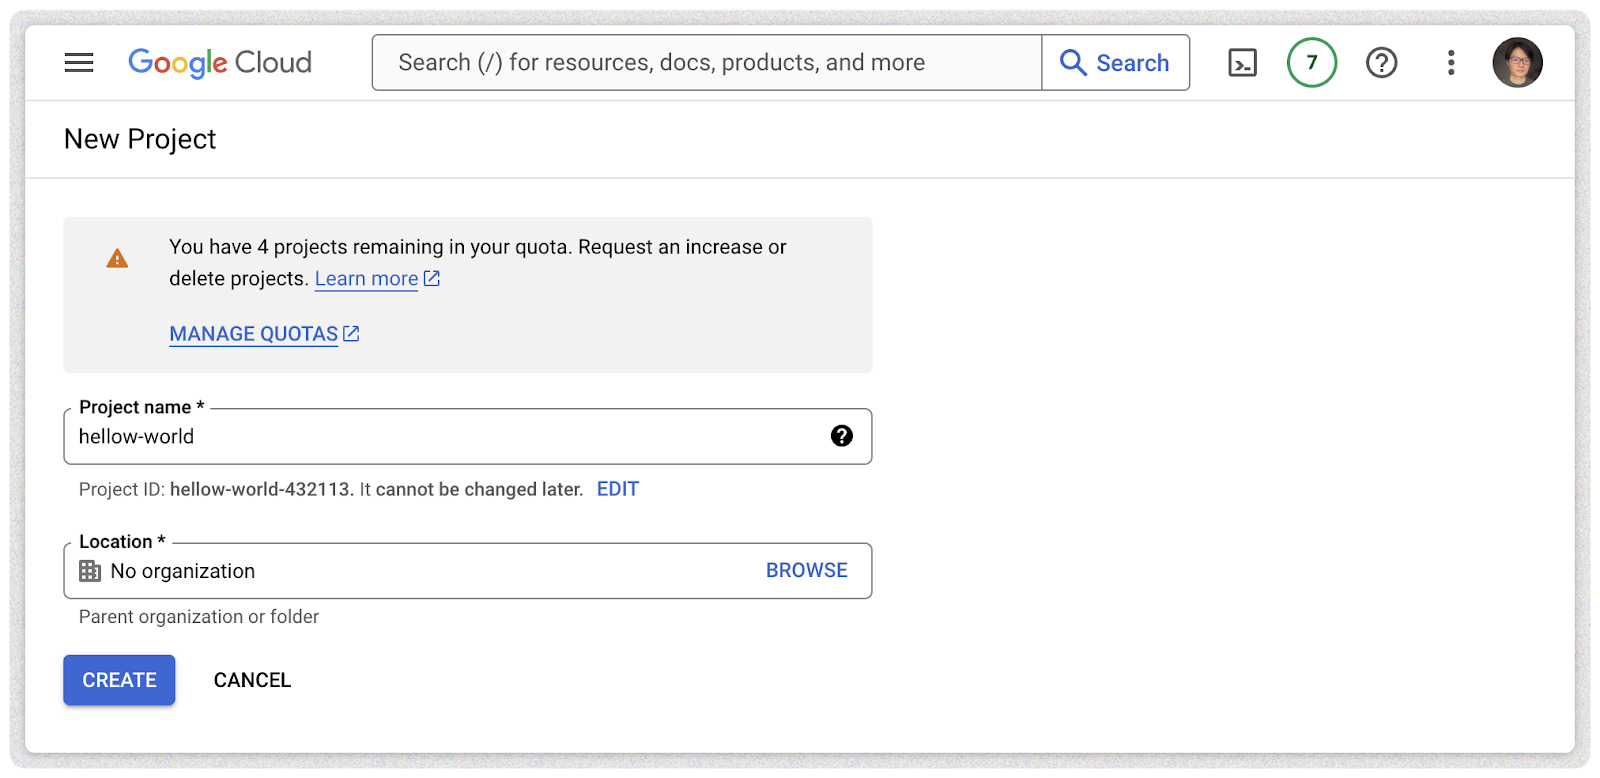
Step 2
Pick a proper name for your project and you can optionally select a location if you are a Google Workspace user, then click the button “CREATE” to continue.
Step 3 (Optional)
If this is your first project, it will be selected by default. And if it’s not, you will need to select the new project from the dropdown list.

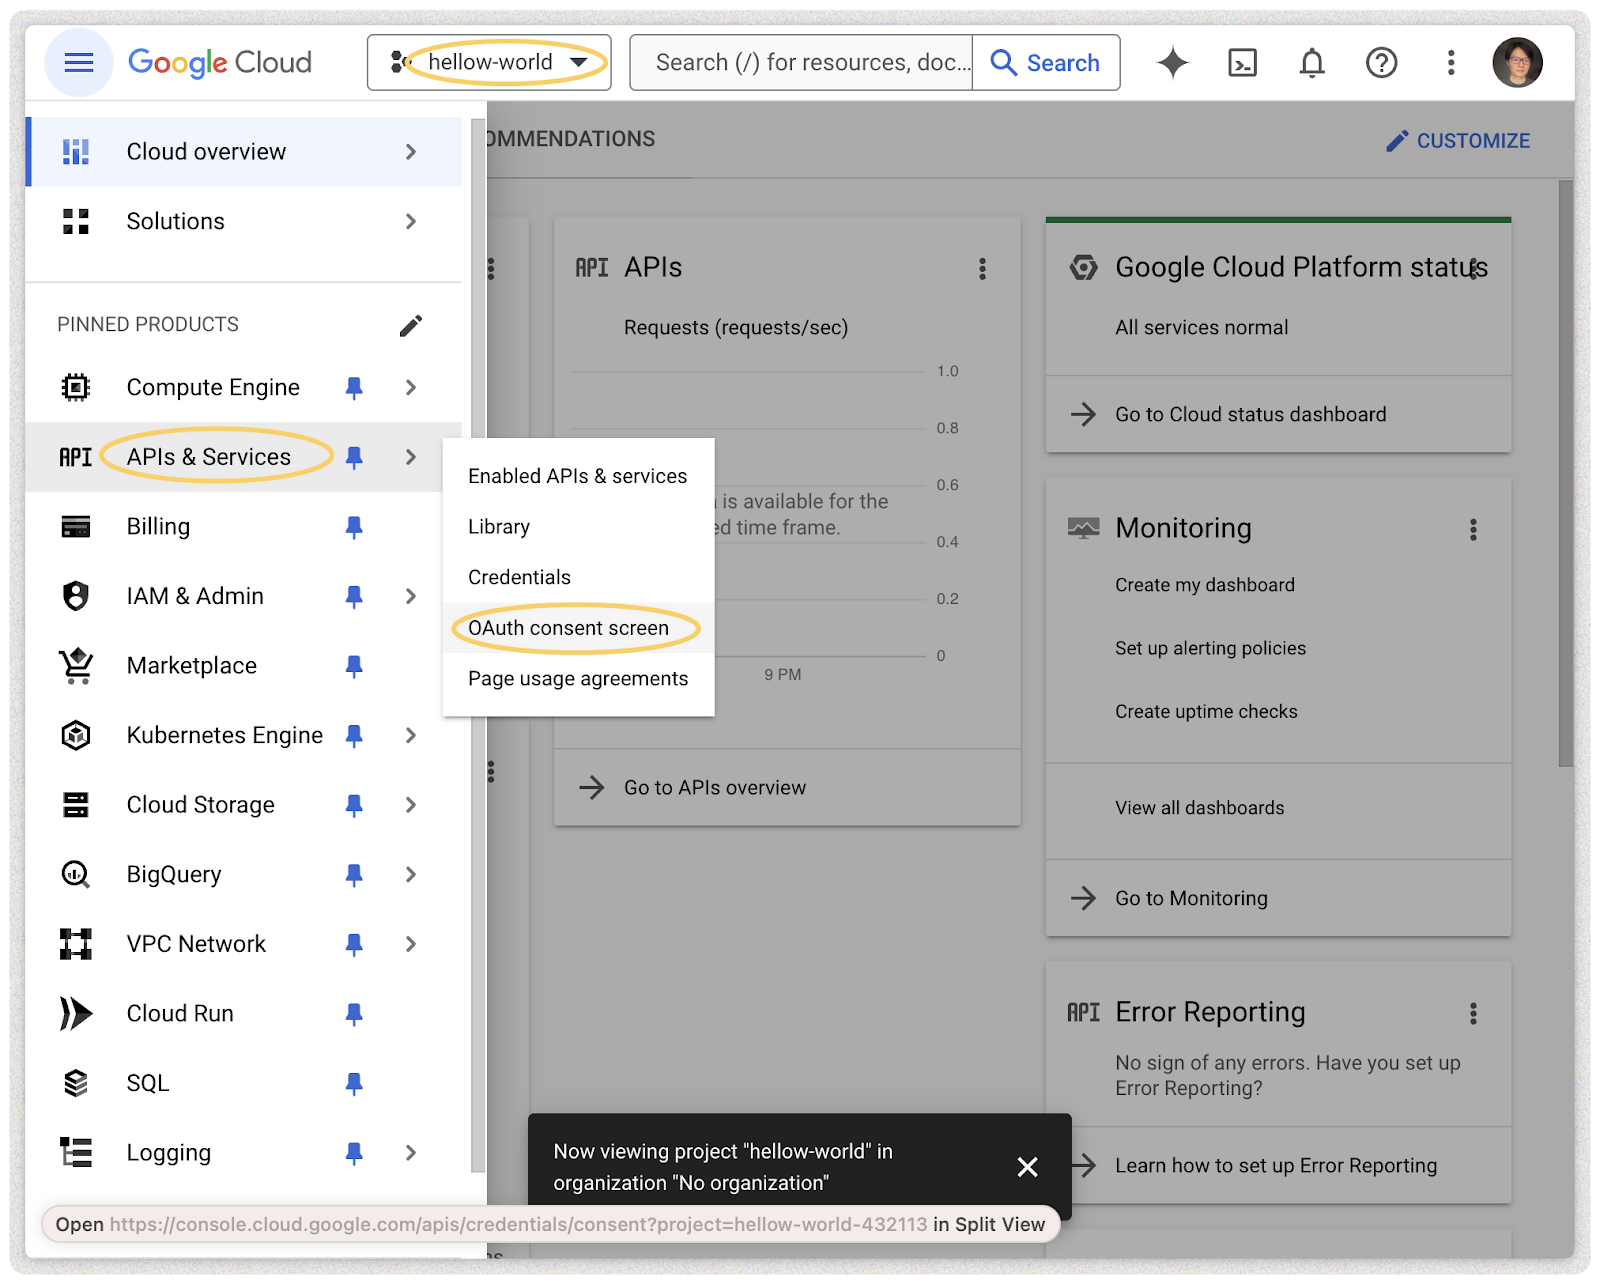
Step 4
Open the sidebar menu, go to “OAuth consent screen” from “APIs & Services” product.
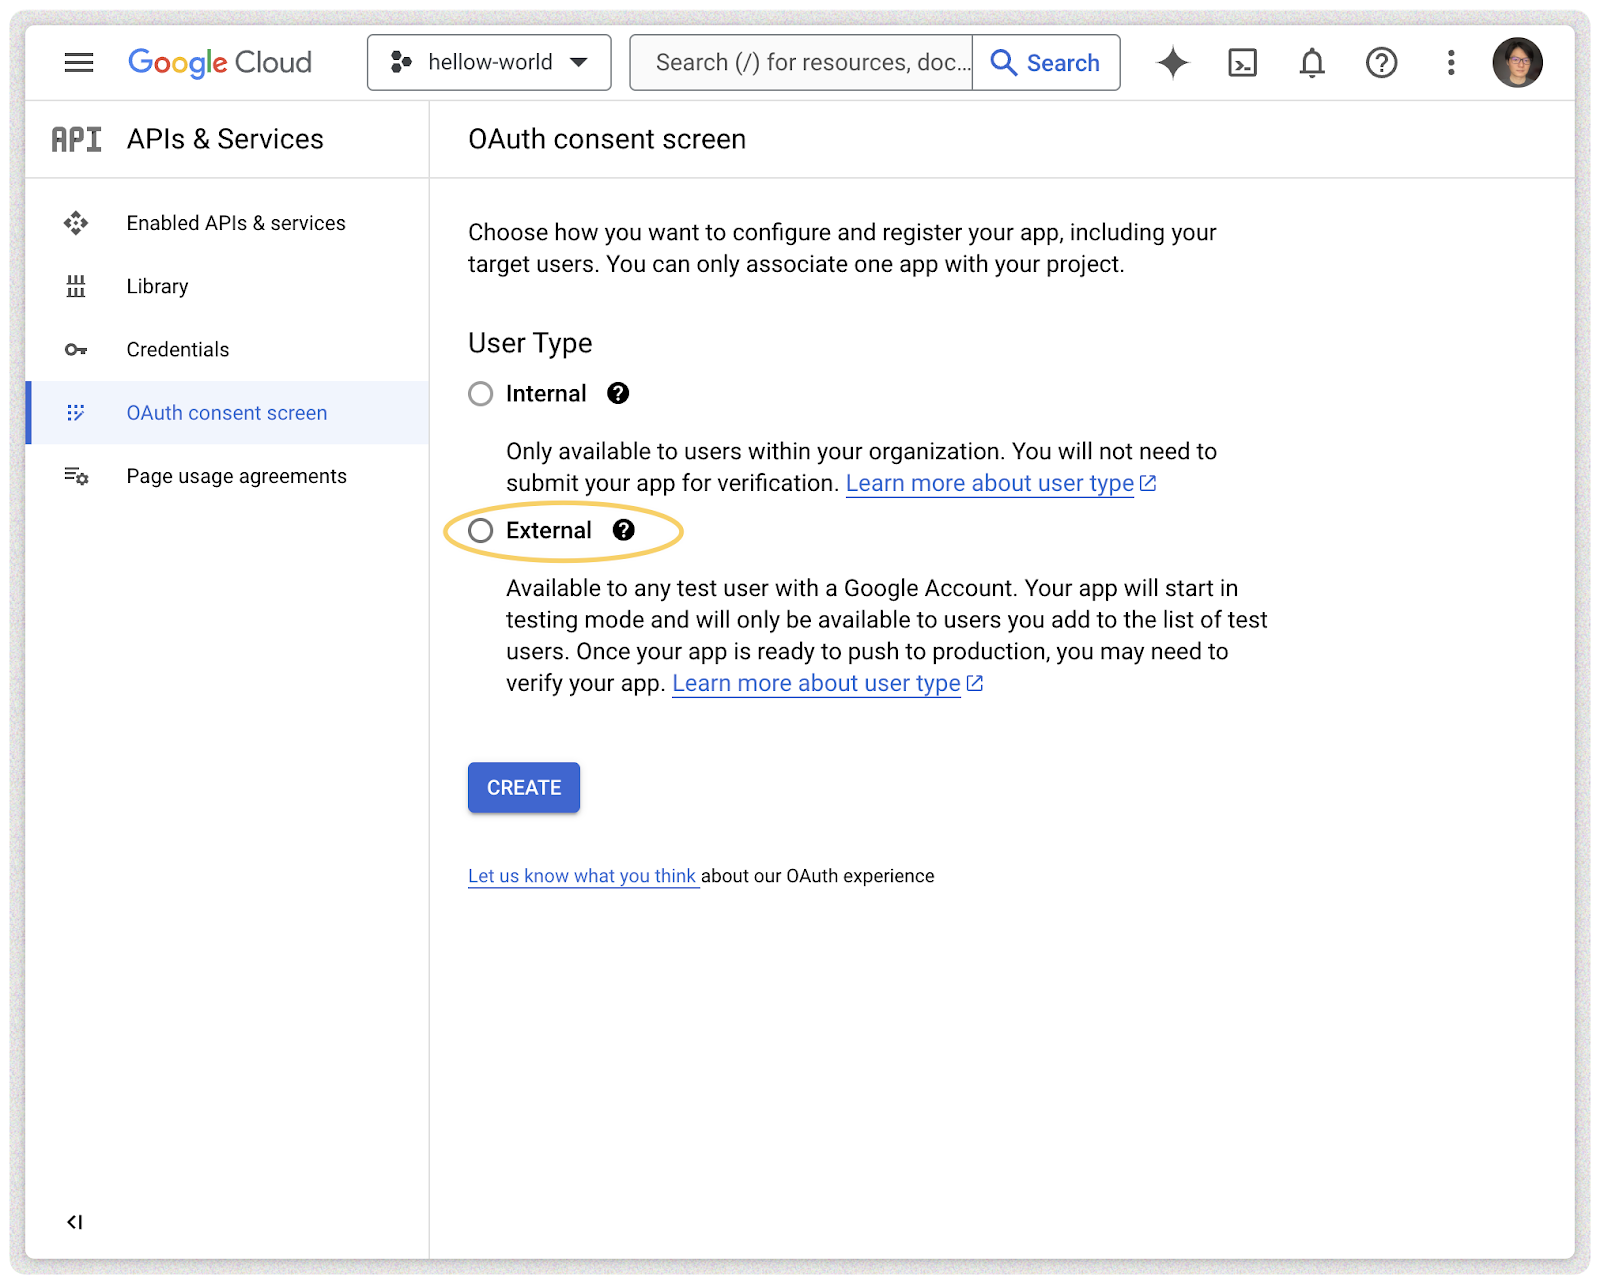
Step 5
Select the “User Type”, “Internal” is for Google Workspace account only, so if you are a free user you’ll only have the “External” option.
Select “Internal” if the project is used only for your organization. For the Workspace users, you should be aware that once the type is selected, it can’t be changed later. And you have to recreate a new project for the correct type you’ll need.
Click the button “CREATE” to continue.
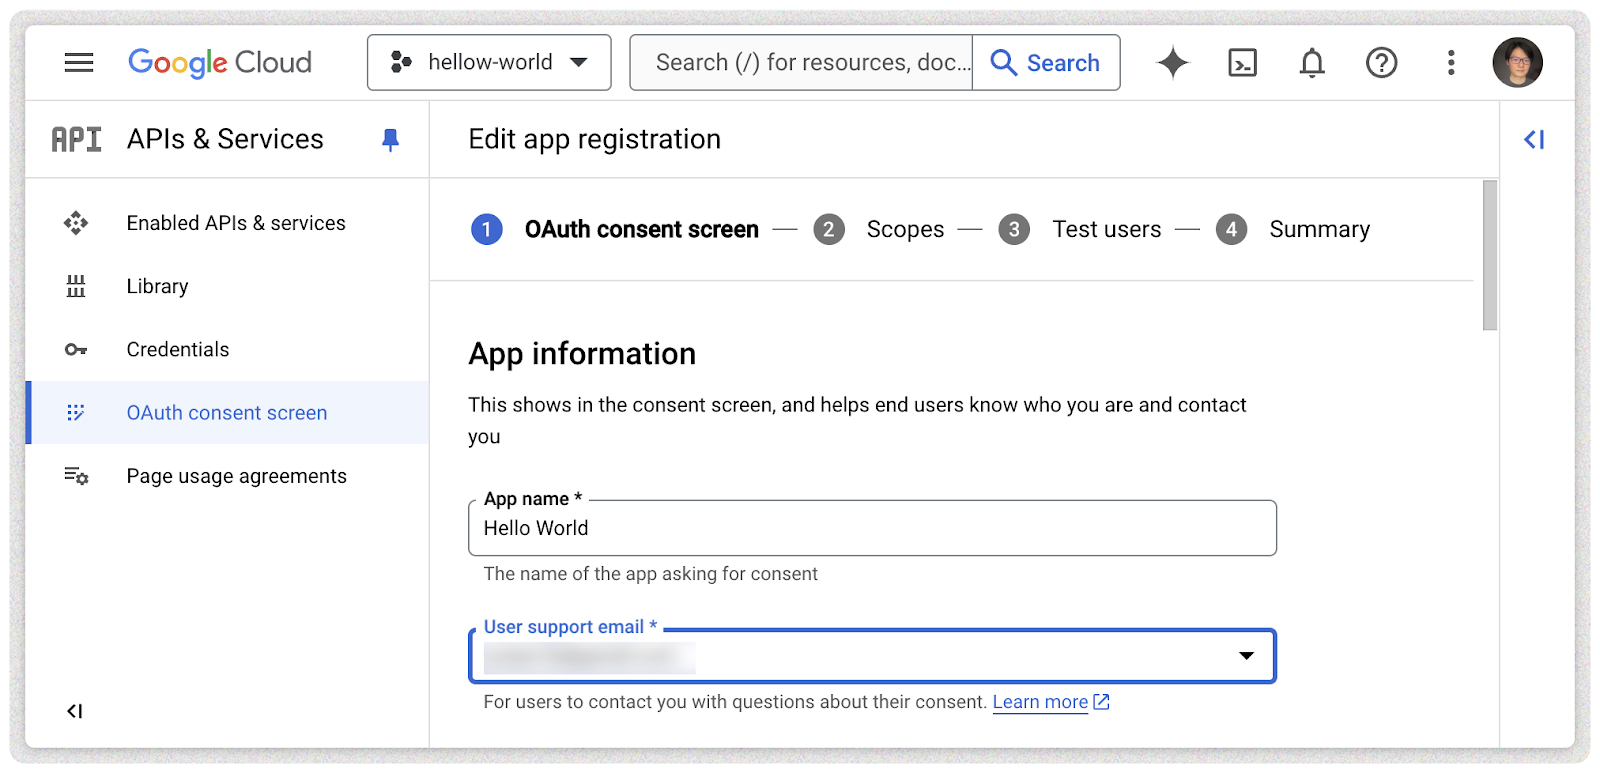
Step 6 - OAuth Consent Screen
If you only need to use the project for yourself or your team and no plan to send your app to Google for review. You only need to fill these 3 required fields, or you’ll need to prepare other links, assets for your application.
- App name *
- User support email *
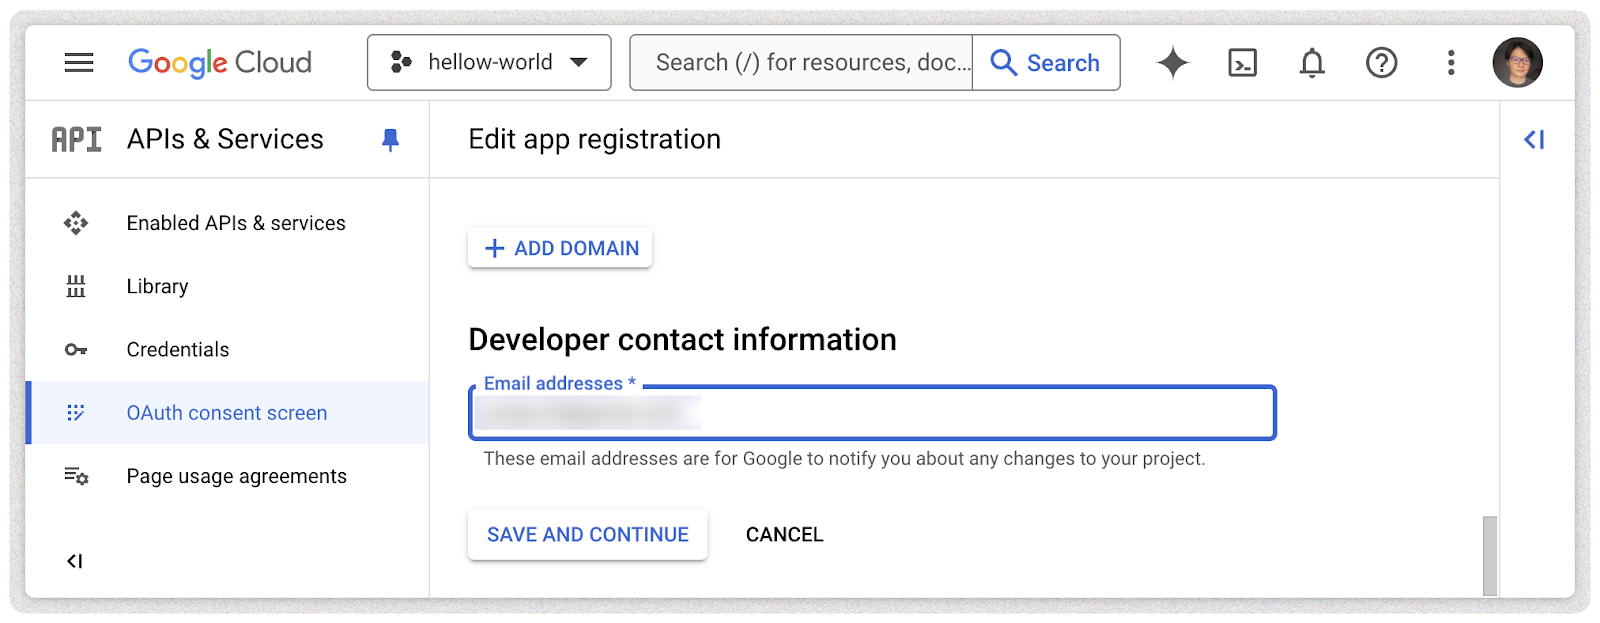
- Email Addresses of developer *
Click the button “SAVE AND CONTINUE”.
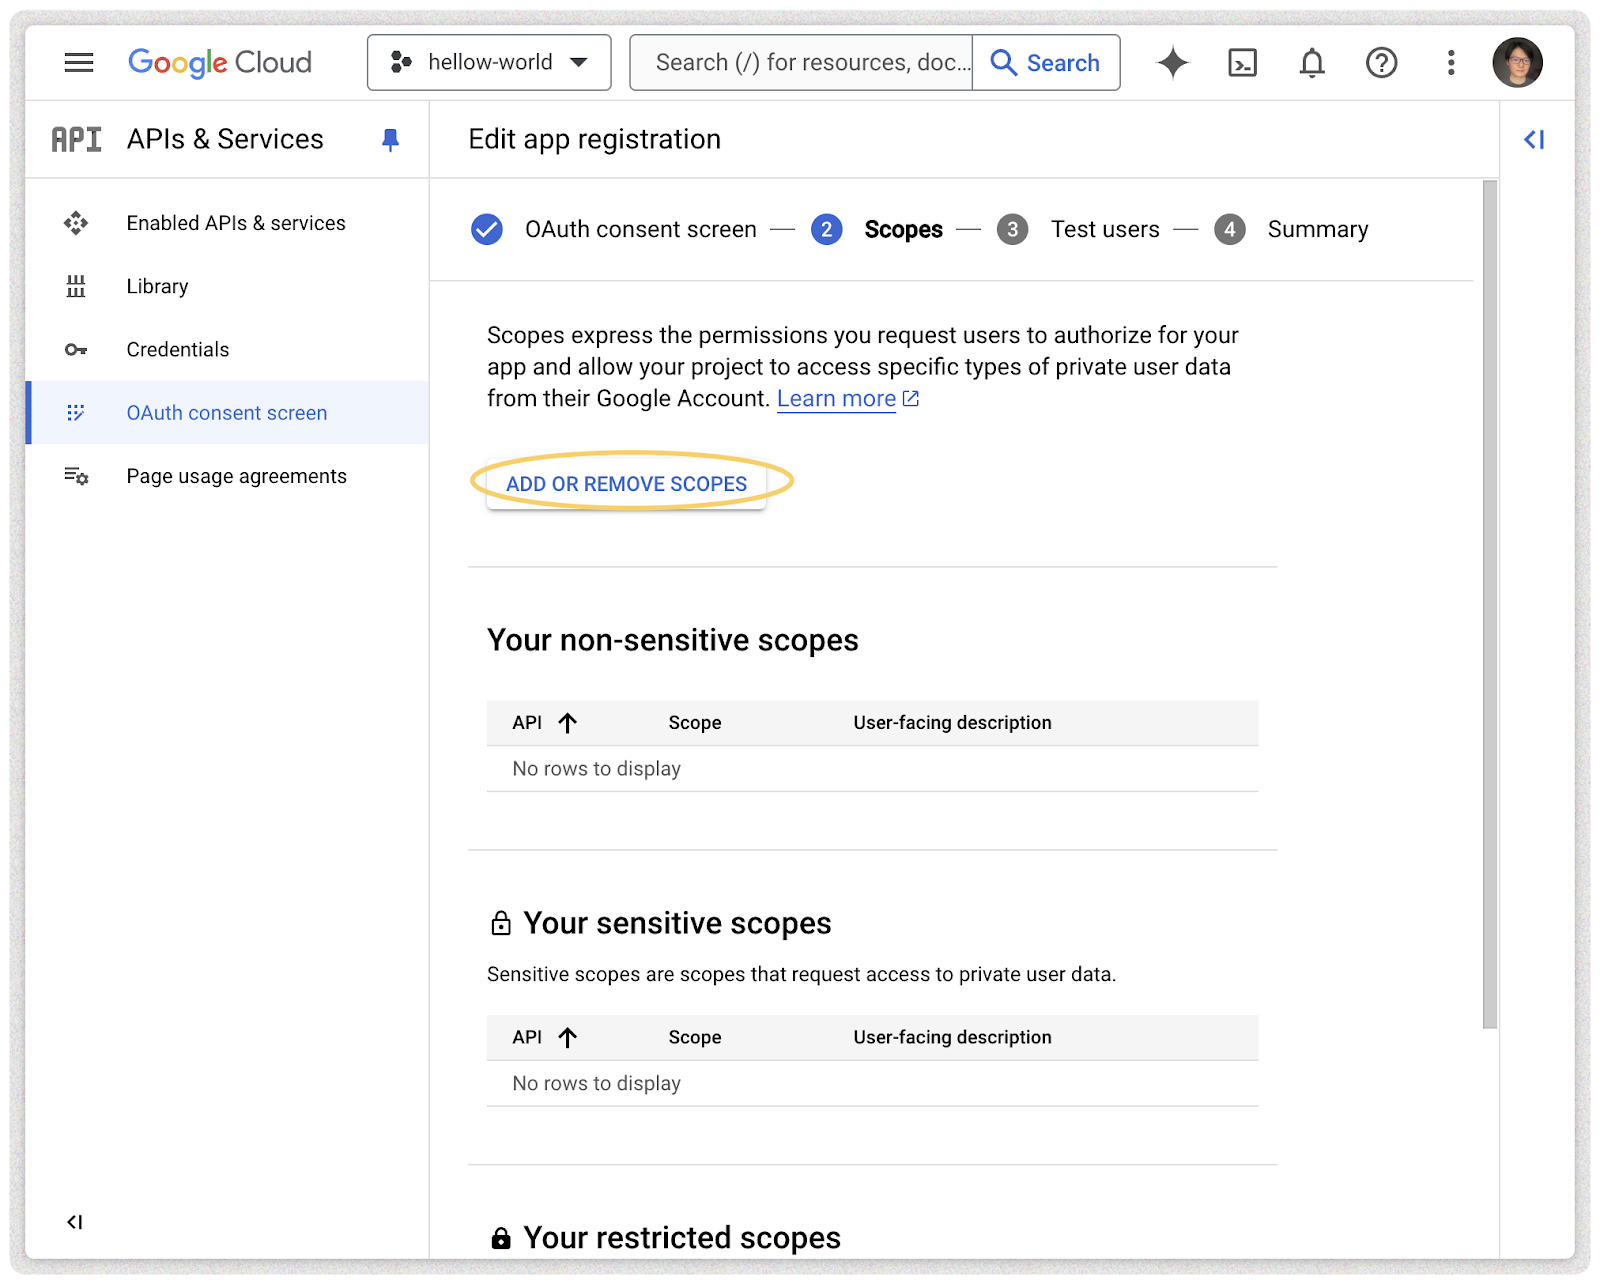
Step 7 - Scopes (Optional)
If the app is for your internal use, you don’t need to add any scope here in this step.
If you are publishing your app, Google will need to review the scopes which are used in your app. You should add all the scopes to this section, you should be able to find the scopes in your Google Apps Script manifest file “appsscript.json” if you add the scopes manually (This is recommended for publishing an app). If you are not manually adding these scopes for your project, Google will add them for you automatically, and you can find them in the project information.
Make sure the list is fully matched with your project, or Google will reject your project during the review section.
The scopes have 3 types, they will be assigned to one of these categories after added.
- Non-sensitive scopes (Good and easy to go with)
- Sensitive Scopes (Your justification will be required with a YouTube video to explain)
- Restricted Scopes (More requirements will be required than sensitive scopes - don’t use them unless you have to)
Click the button “SAVE AND CONTINUE” to the next section.
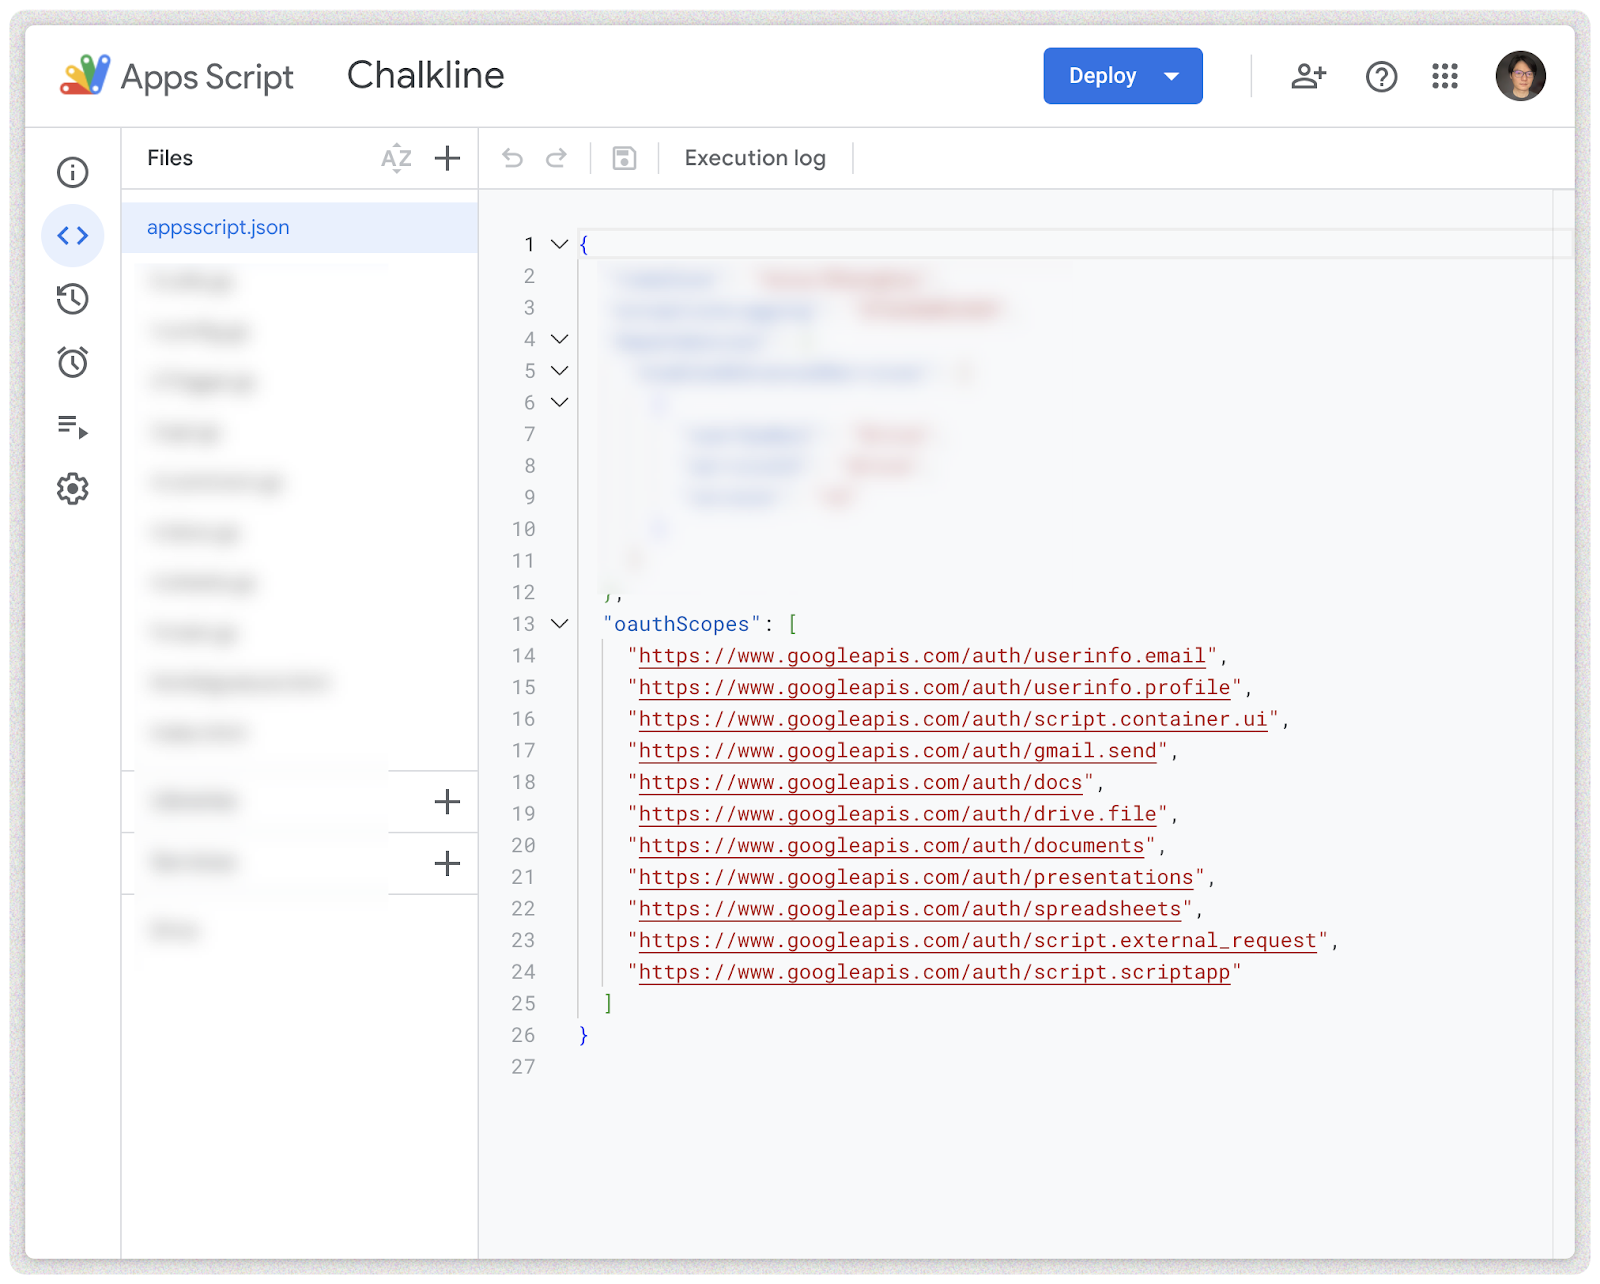
Example of scopes manually added into appsscript.json manifest.
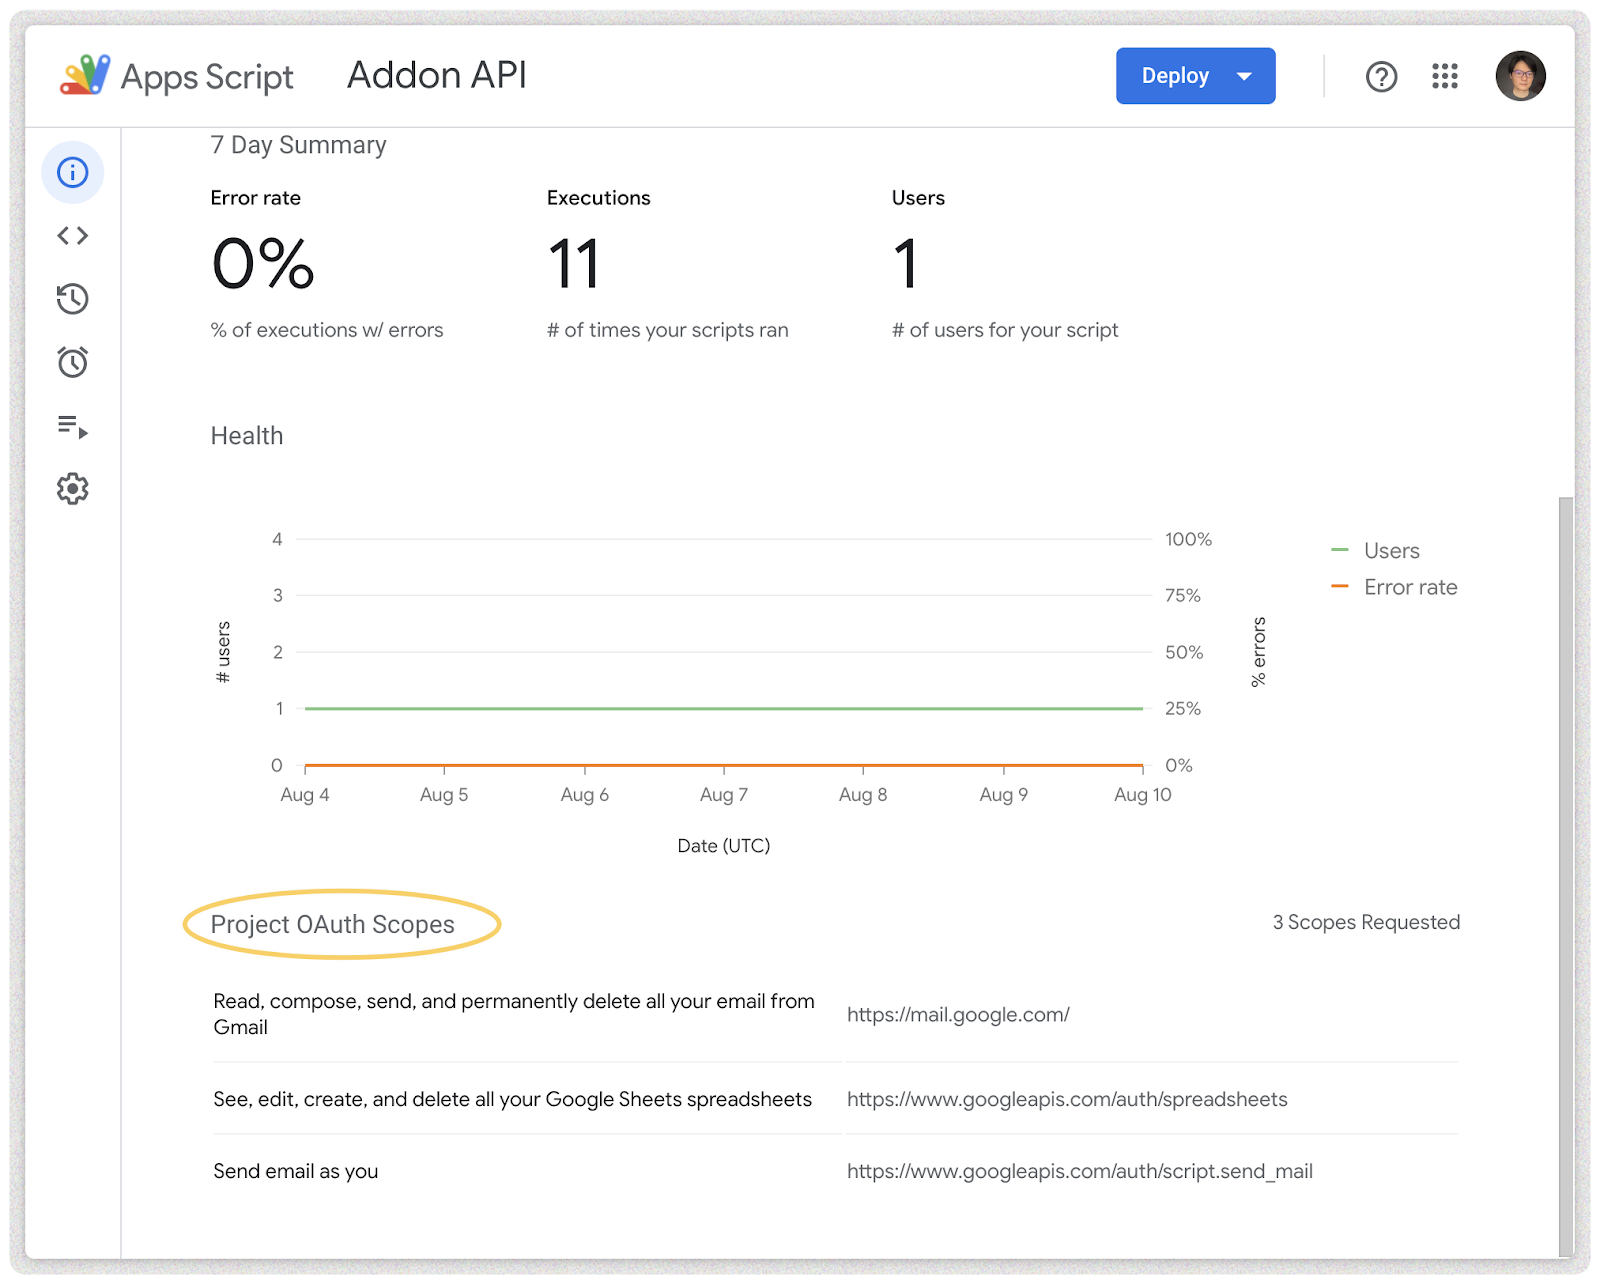
Example of scopes added by Google Automatically for your project information.
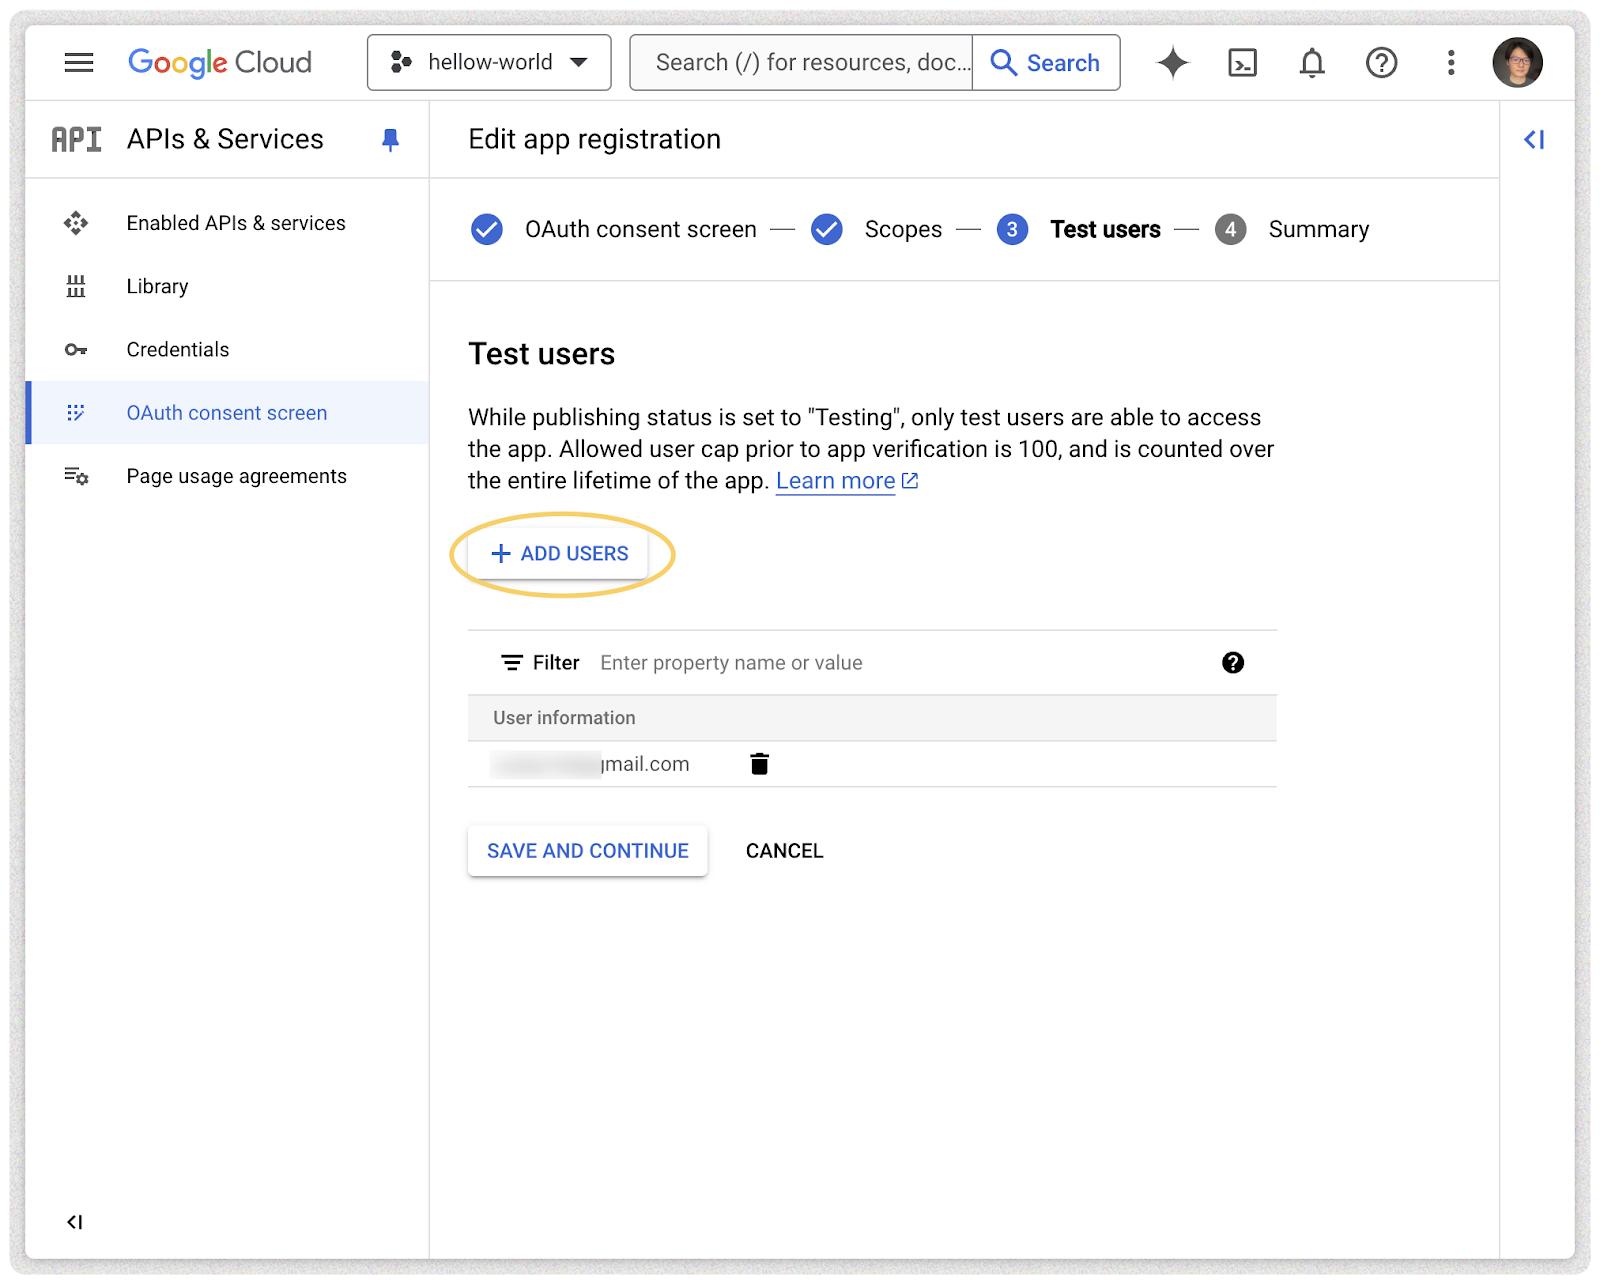
Step 8 - Test Users
If you’re not planning to publish this project, you’ll need to add the users as the test users of your project, so they can use this project. Or they will get an error that says “App” is blocked by Google when they try to authorize the app.
If you’re publishing your project, make sure all the developers and testers are added to the test users list, or they will not be able to use it before the publication of your app.
In conclusion, any user who needs to use the app before the publish has to be added to this list. Internal apps will never be published, so you’ll need to add all your internal users to this list. Please note we have a 100 users limitation.
Click the button “SAVE AND CONTINUE” to the next section.
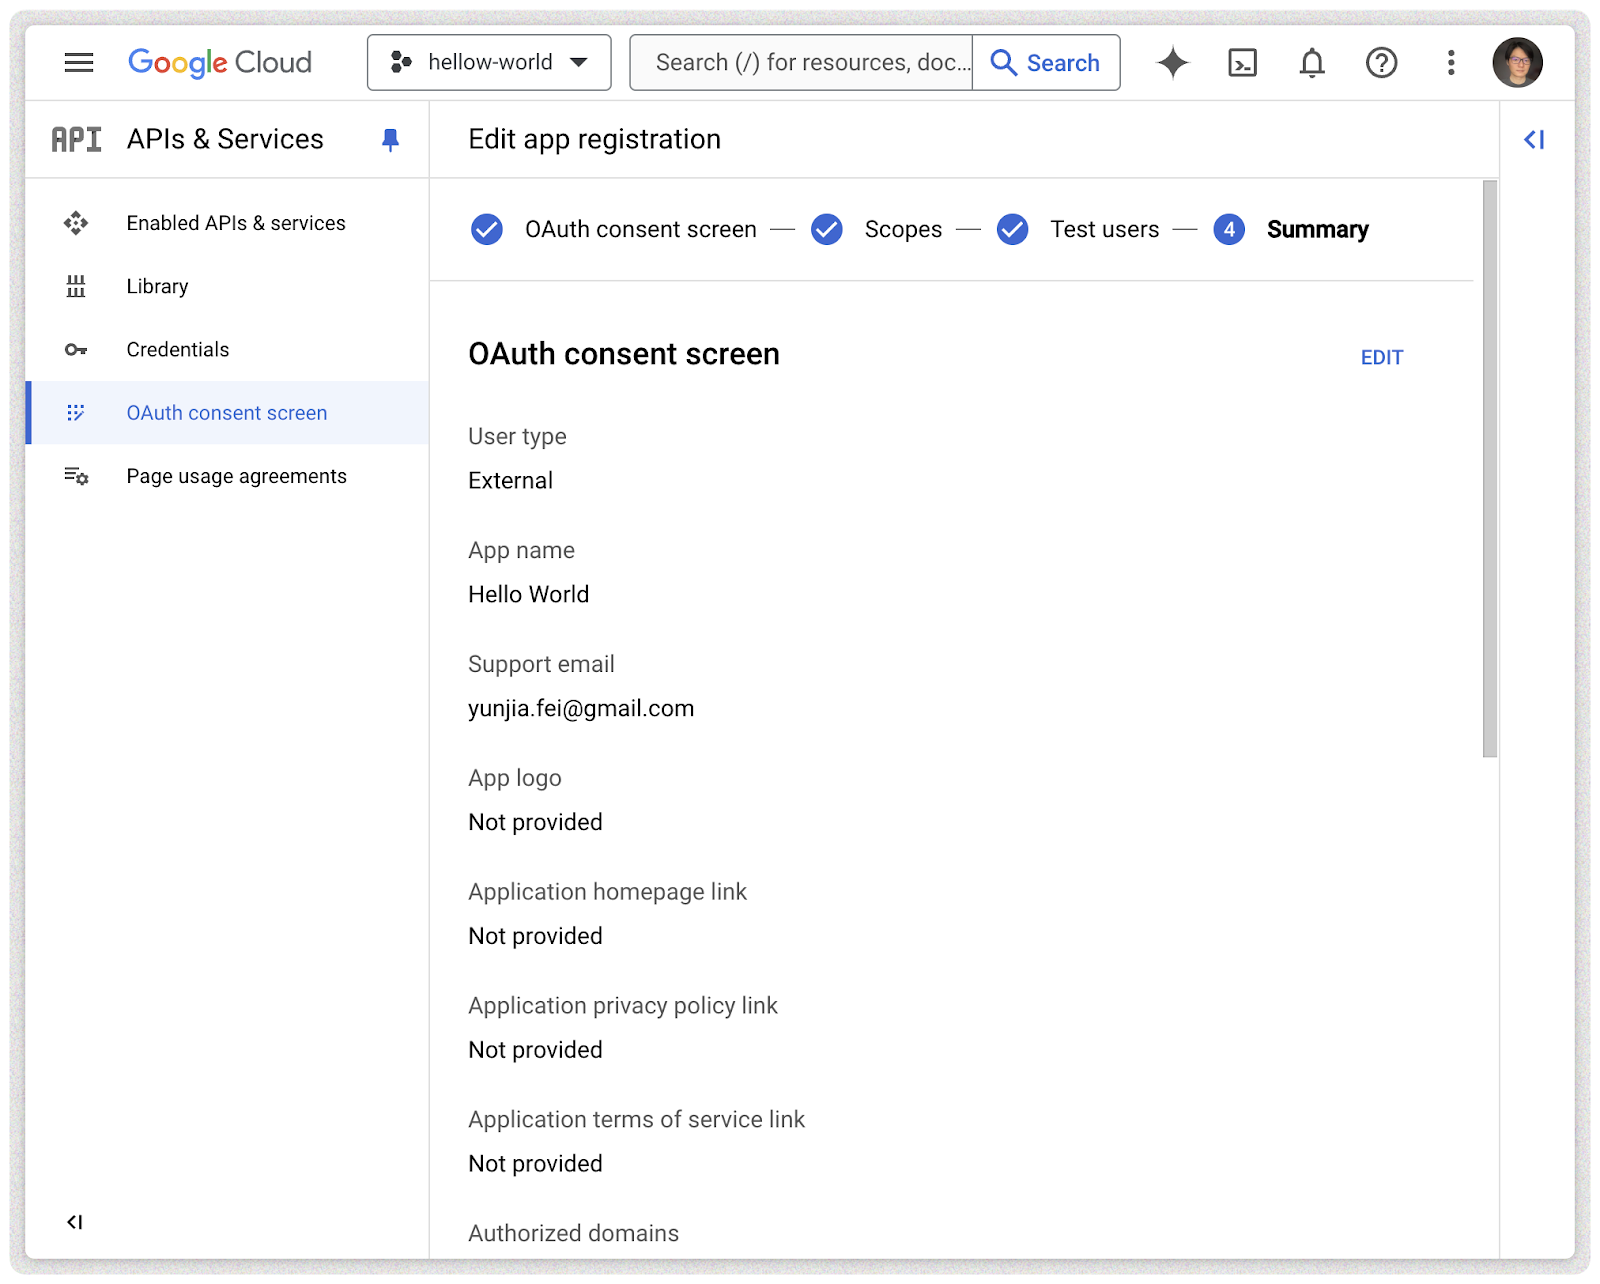
Step 9 - Summary
Now you have the OAuth consent screen setup and this is a summary of your app. Scroll down and click the button to go back to the dashboard.
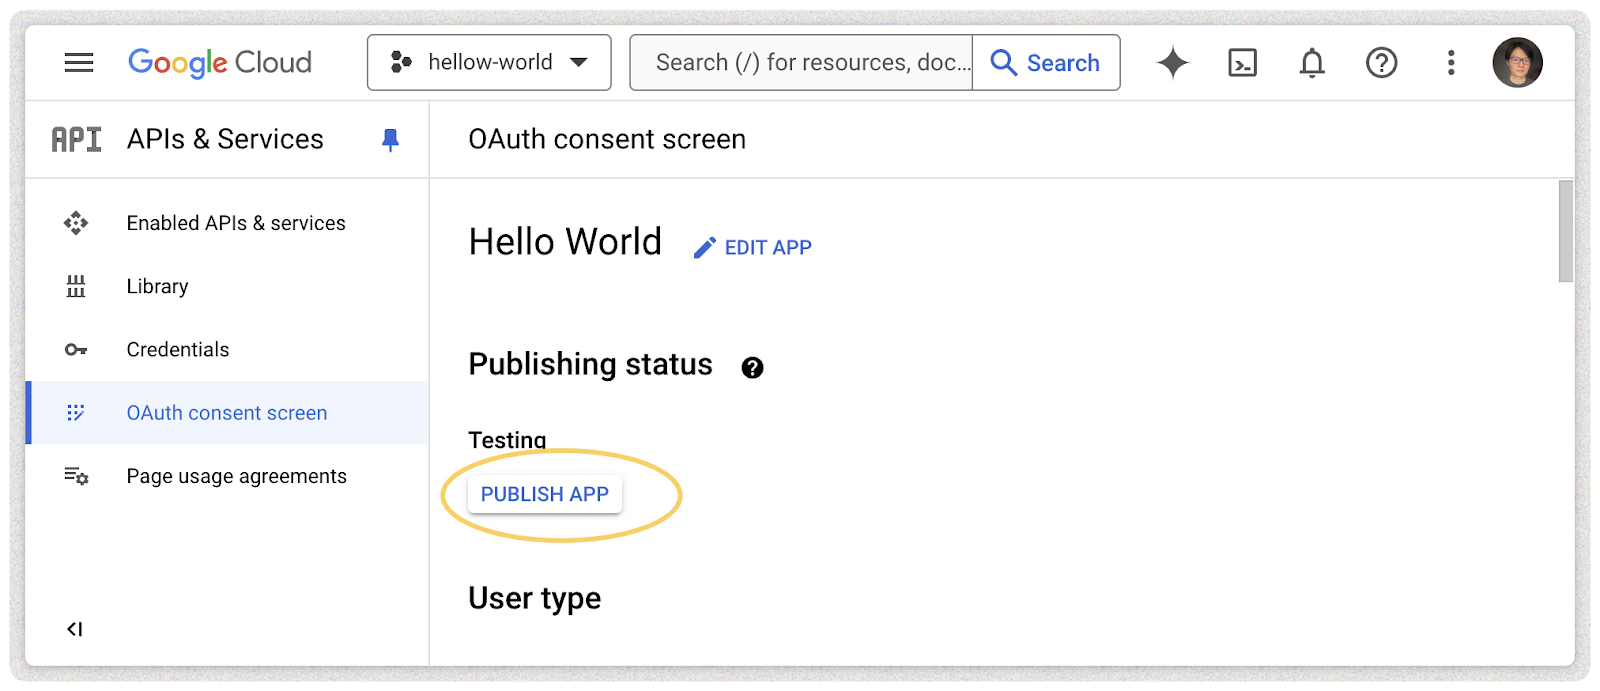
Step 10 - Publish App (Optional)
At this stage, the publishing status is “Testing”. If you want to publish your project, click the button “Publish APP” and it will send your app to Google for review.
An automatic email will be sent to you from Google, you will need to review the email and confirm it to start the review process, if Google needs you to provide more information about your app or you have any questions, you can keep communicating there.
And if you need to update your app, like adding a new scope for your app or uploading a new logo of your app. Use the “EDIT APP” button and this will bring you to Step 6 - OAuth consent screen, make the change and resubmit your app for a new review to Google.
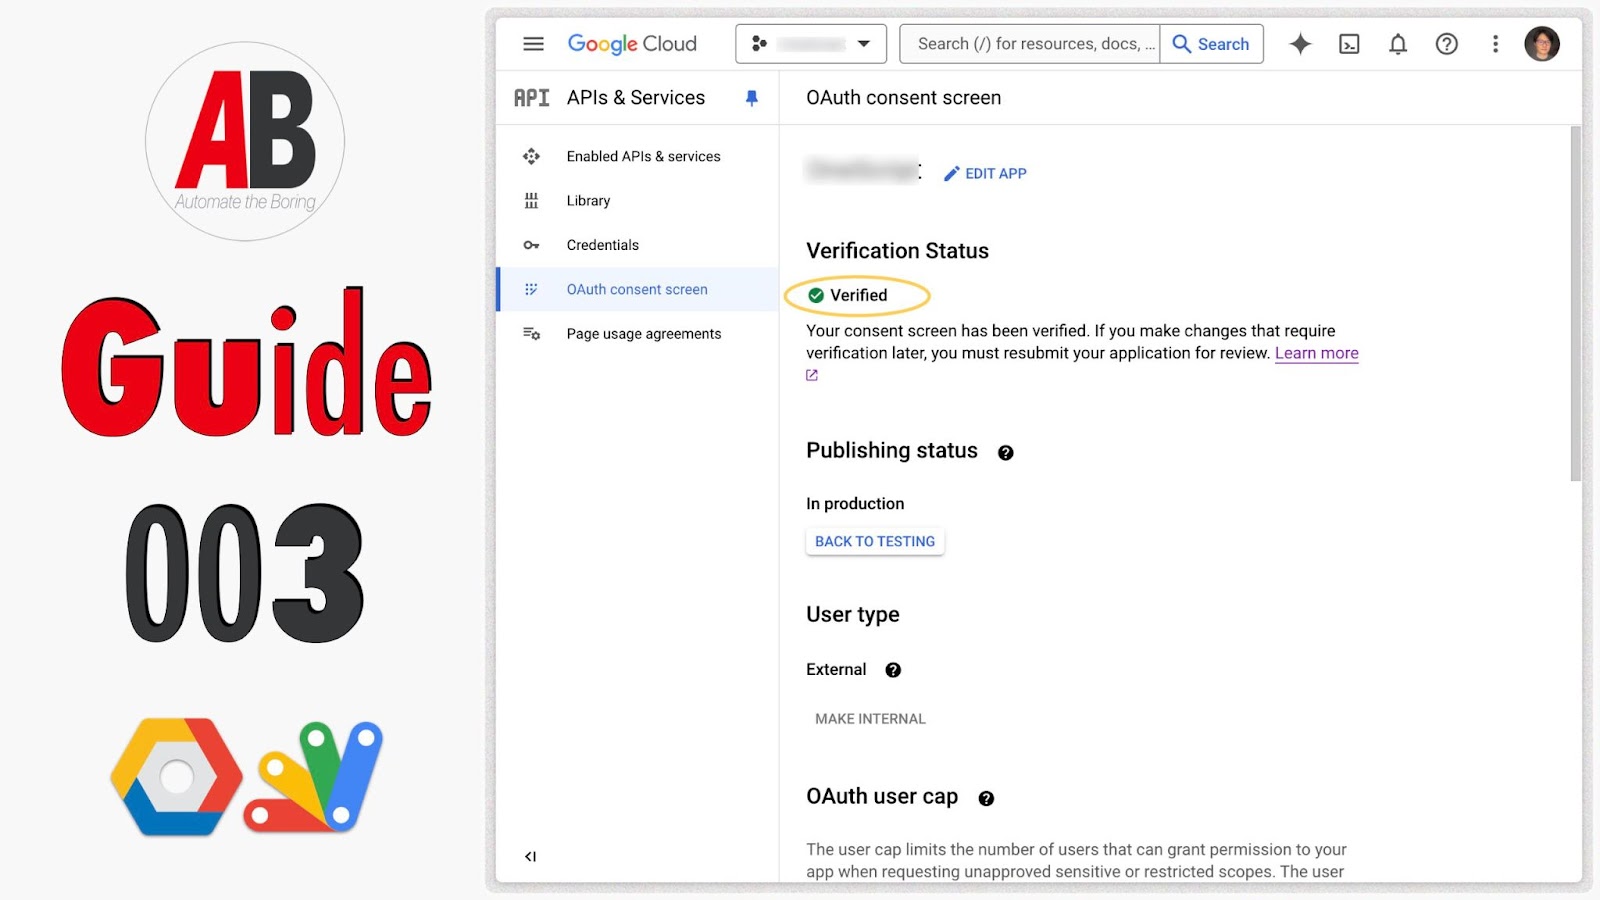
If Google approved your app, your app will be “Verified”, and the publishing status will be “In Production”.
Step 11 - Enable the APIs (Optional)
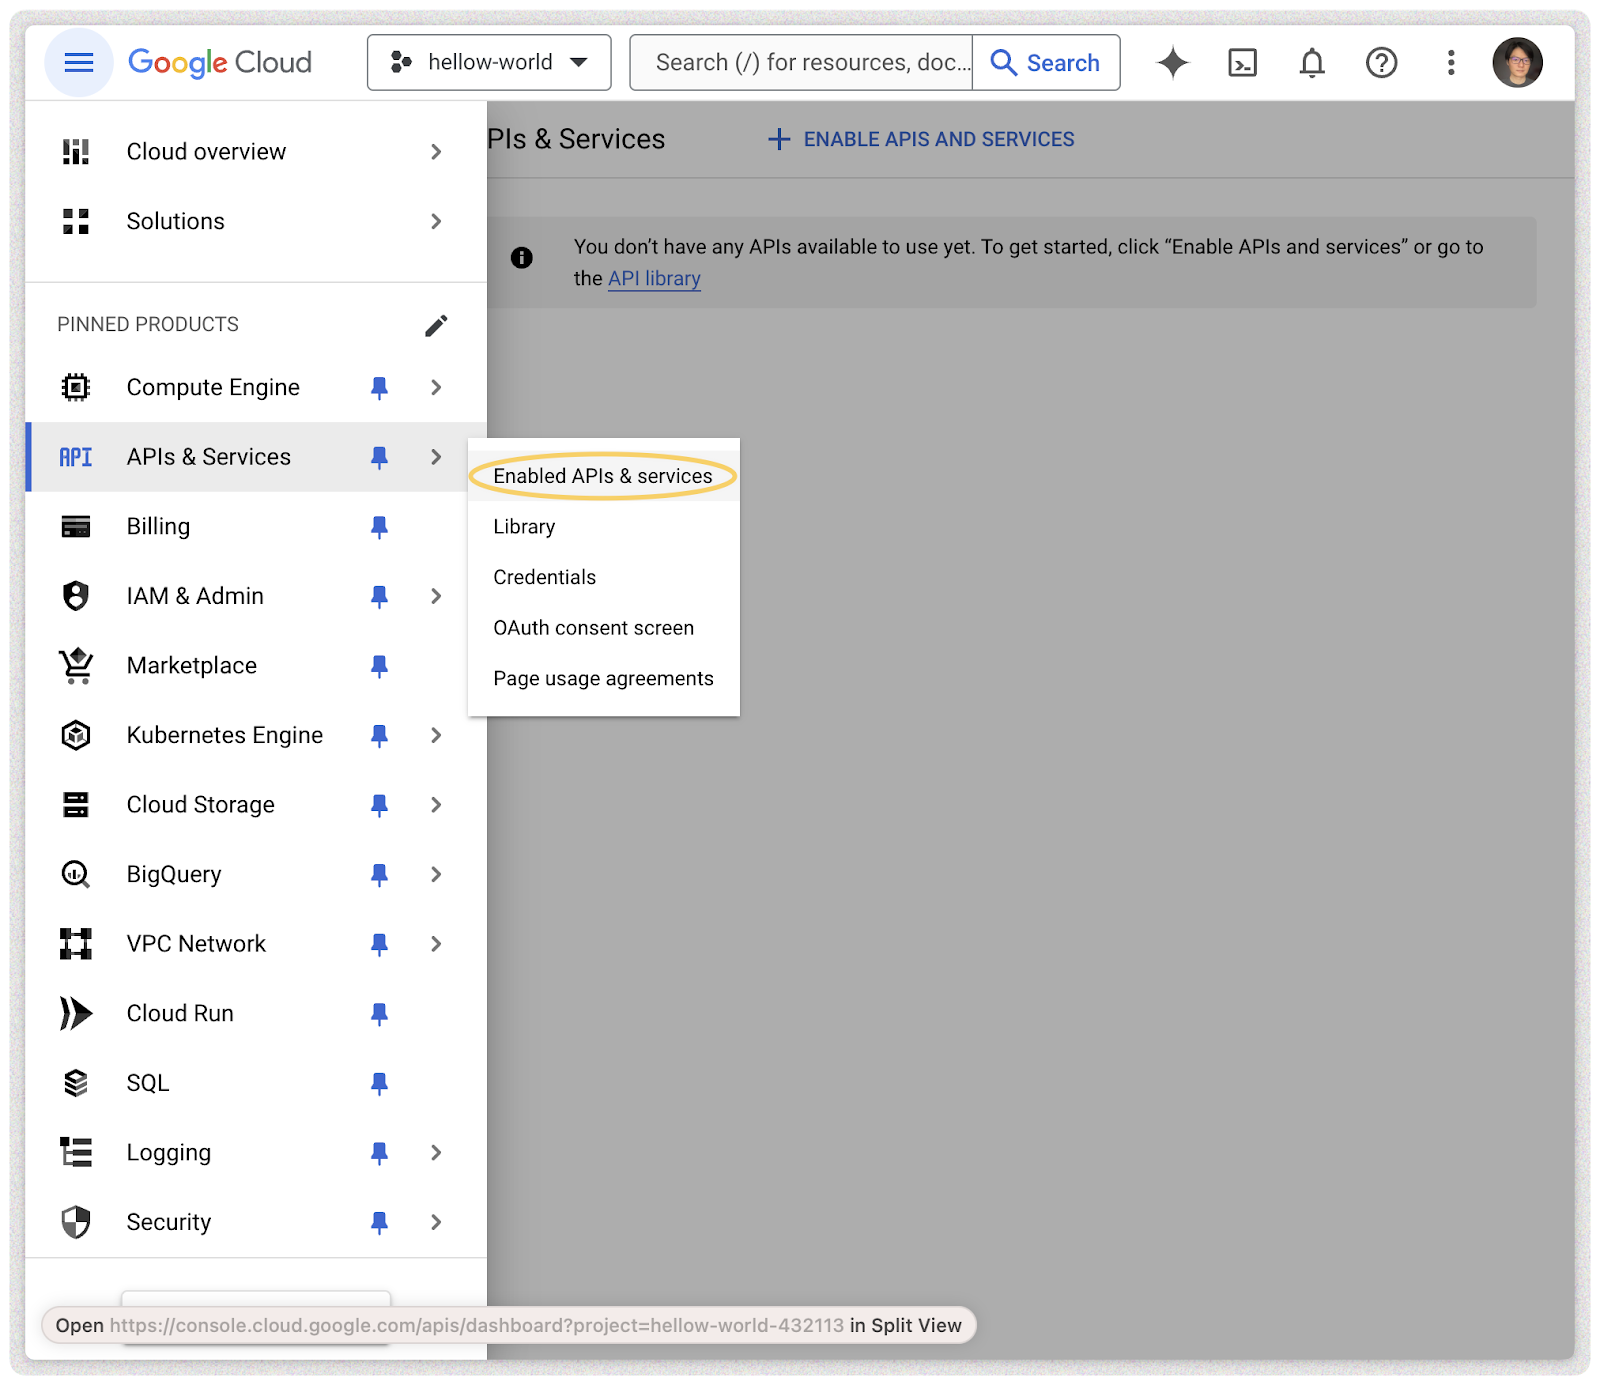
Open the sidebar menu, and go to “Enabled APIs & Services” in the “APIs & Services” product. And click the button “+ ENABLE APIS AND SERVICES” to continue.
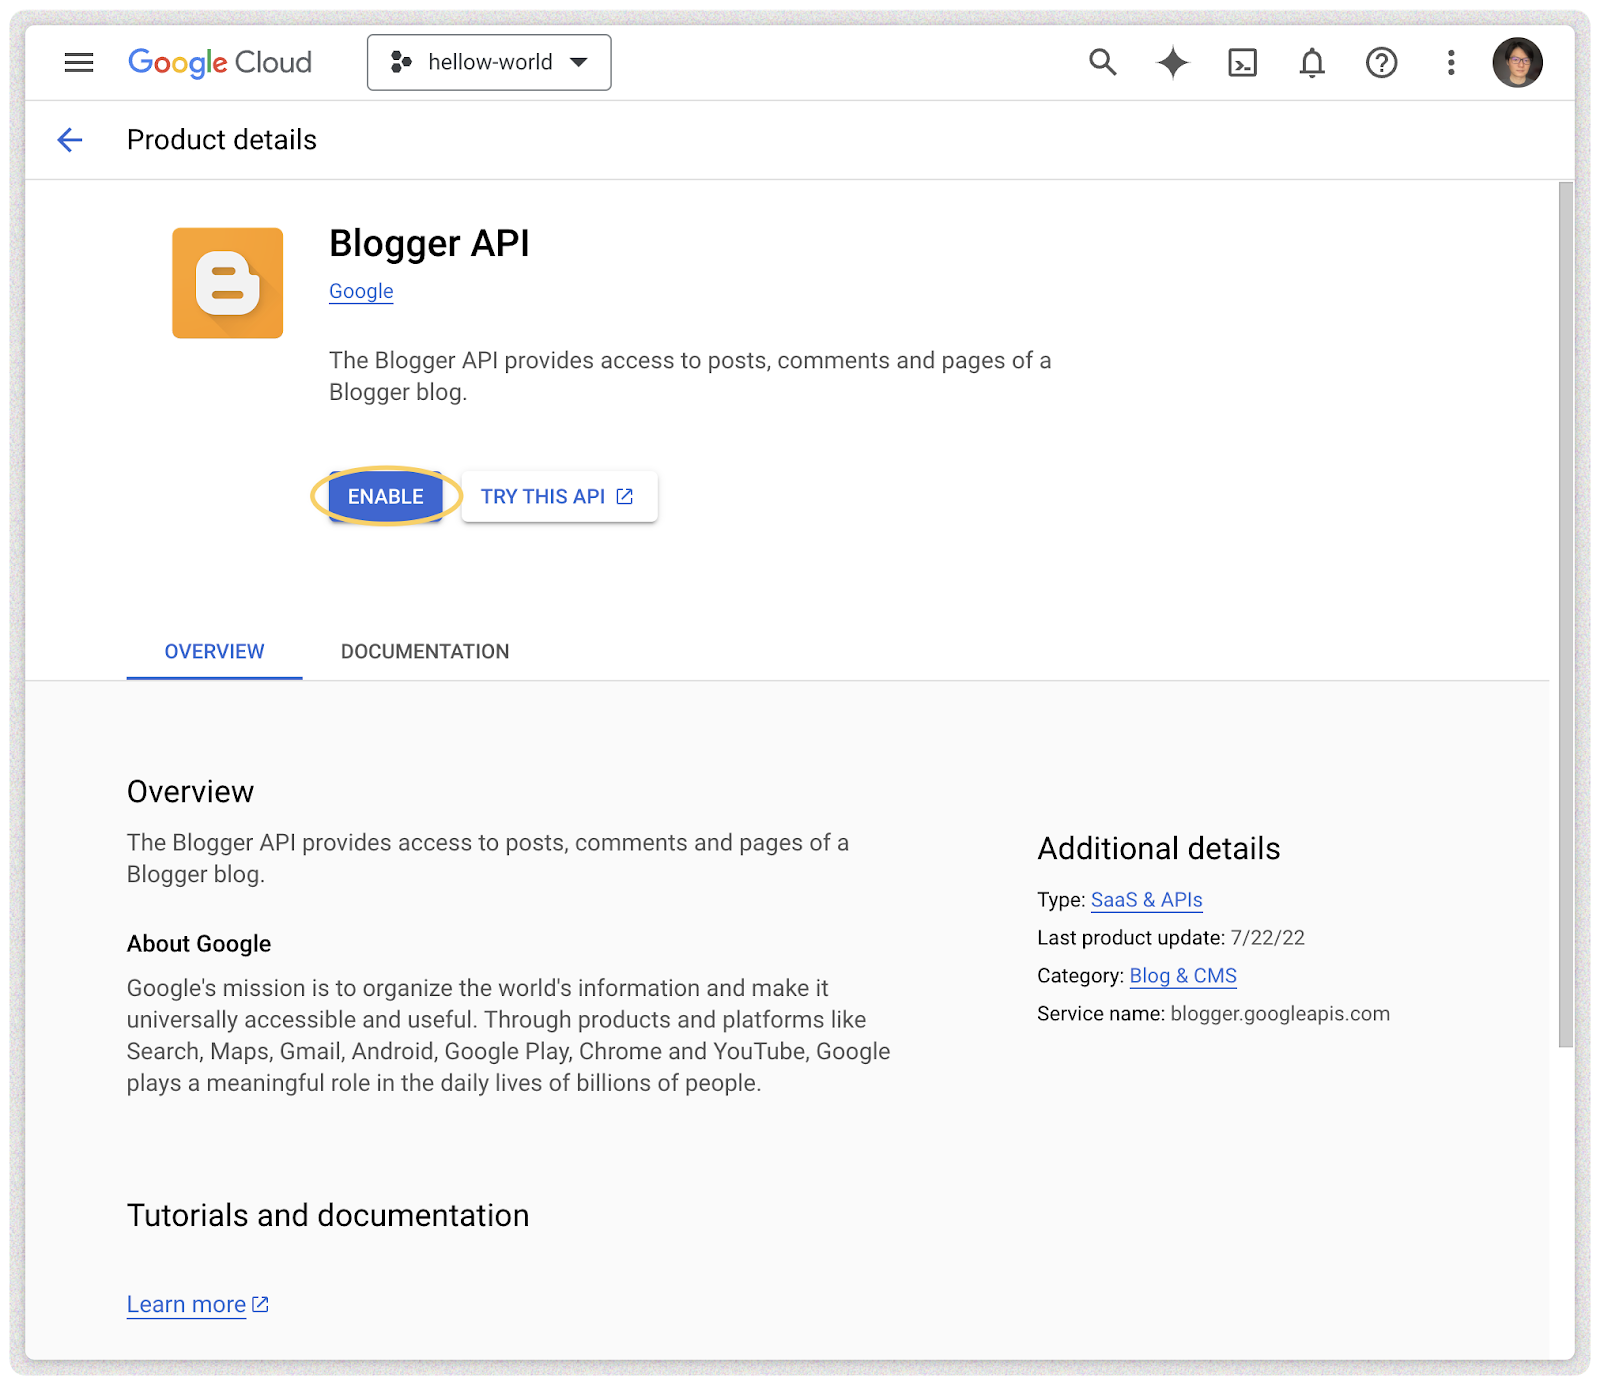
Search for the API you need to add, for example “Google Blogger API”, and enable it by clicking the button “ENABLE”. Once it’s been added, you’ll have access to use this API in your Google Apps Script project.
Step 12
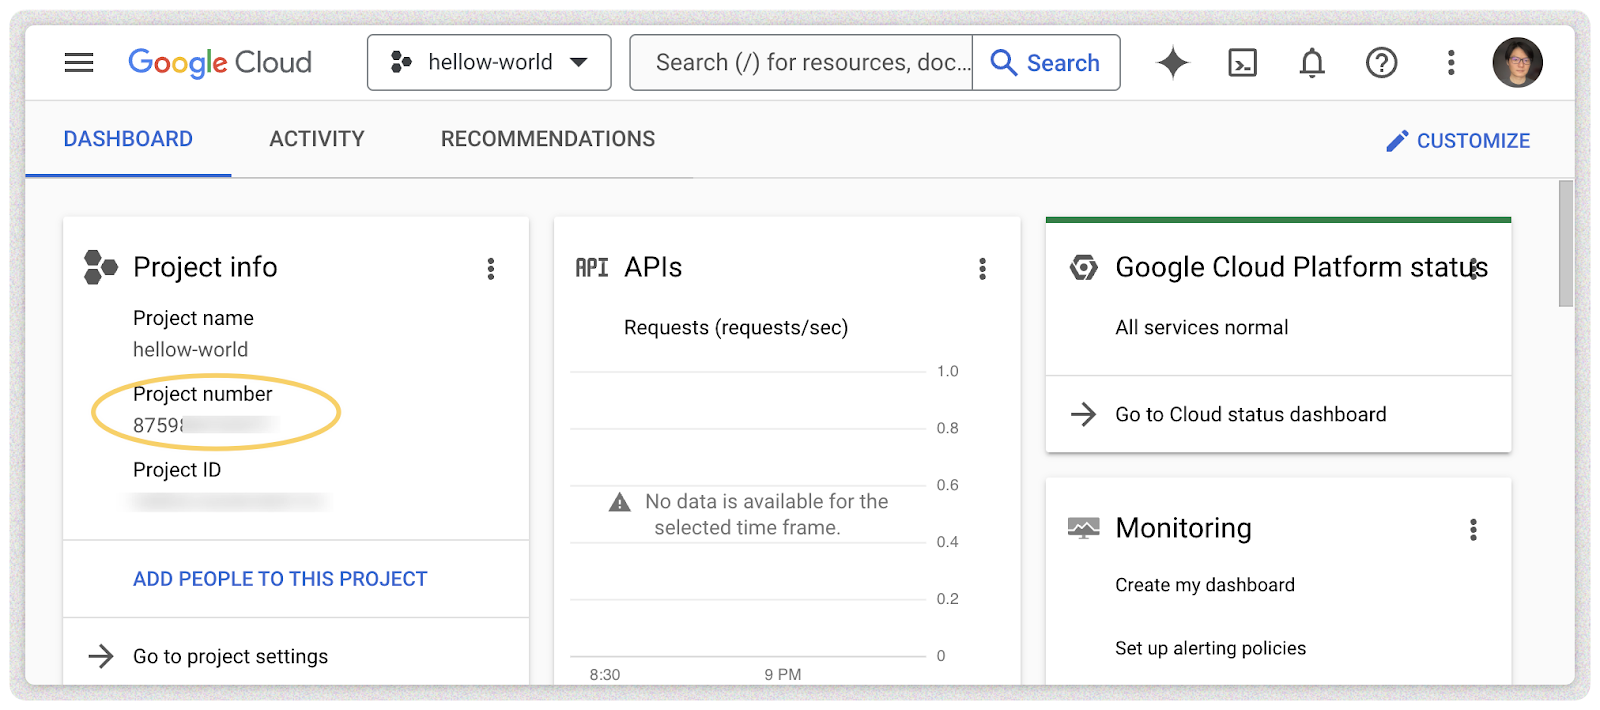
Finally, go back to the dashboard and copy the project number for your Google Apps Script to connect.
Step 13
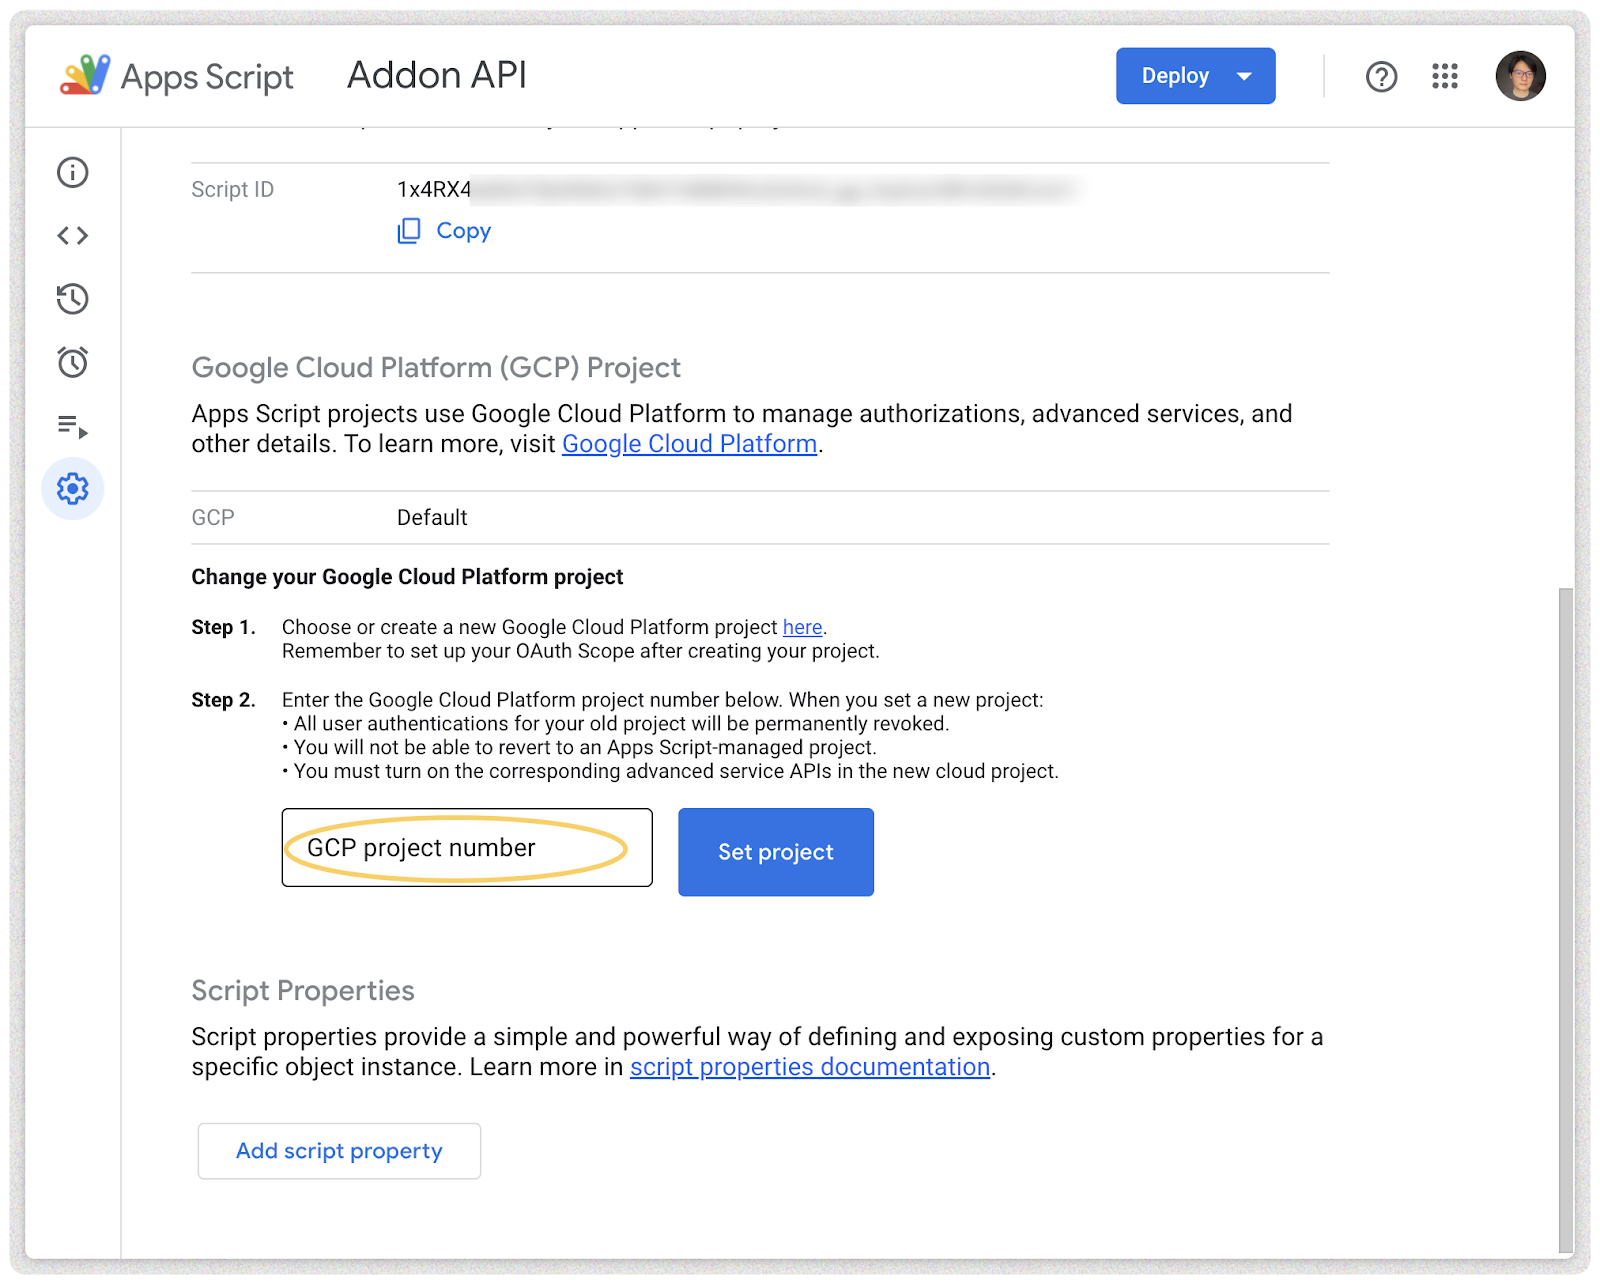
In your Google Apps Script project settings, paste the project number and set the project, and now you have done all the steps and you’ll have the access to use Google Blogger API if you enabled it for the project. And if you need any other Google Services, you just need to update your project.
Step 14 (Optional)
You may have to manually add the scopes in your Google Apps Script project if the scopes can’t be added by Google automatically for you.
For example, we don’t have the Google Blogger API built-in Google Apps Script, to use it in our project, we have to manually add “https://www.googleapis.com/auth/blogger” scope in the list and to use the UrlFetchApp for the API calls we need “https://www.googleapis.com/auth/script.external_request”.
To explain this for beginners, if you have SpreadsheetApp API used in your code, the scope for Google Sheets API “https://www.googleapis.com/auth/spreadsheets” will be added automatically for you and you can find it in the project overview section.
If you can’t see the file “appsscript.json” in your project, go to the project settings, and make sure “Show "appsscript.json" manifest file in editor” is checked.
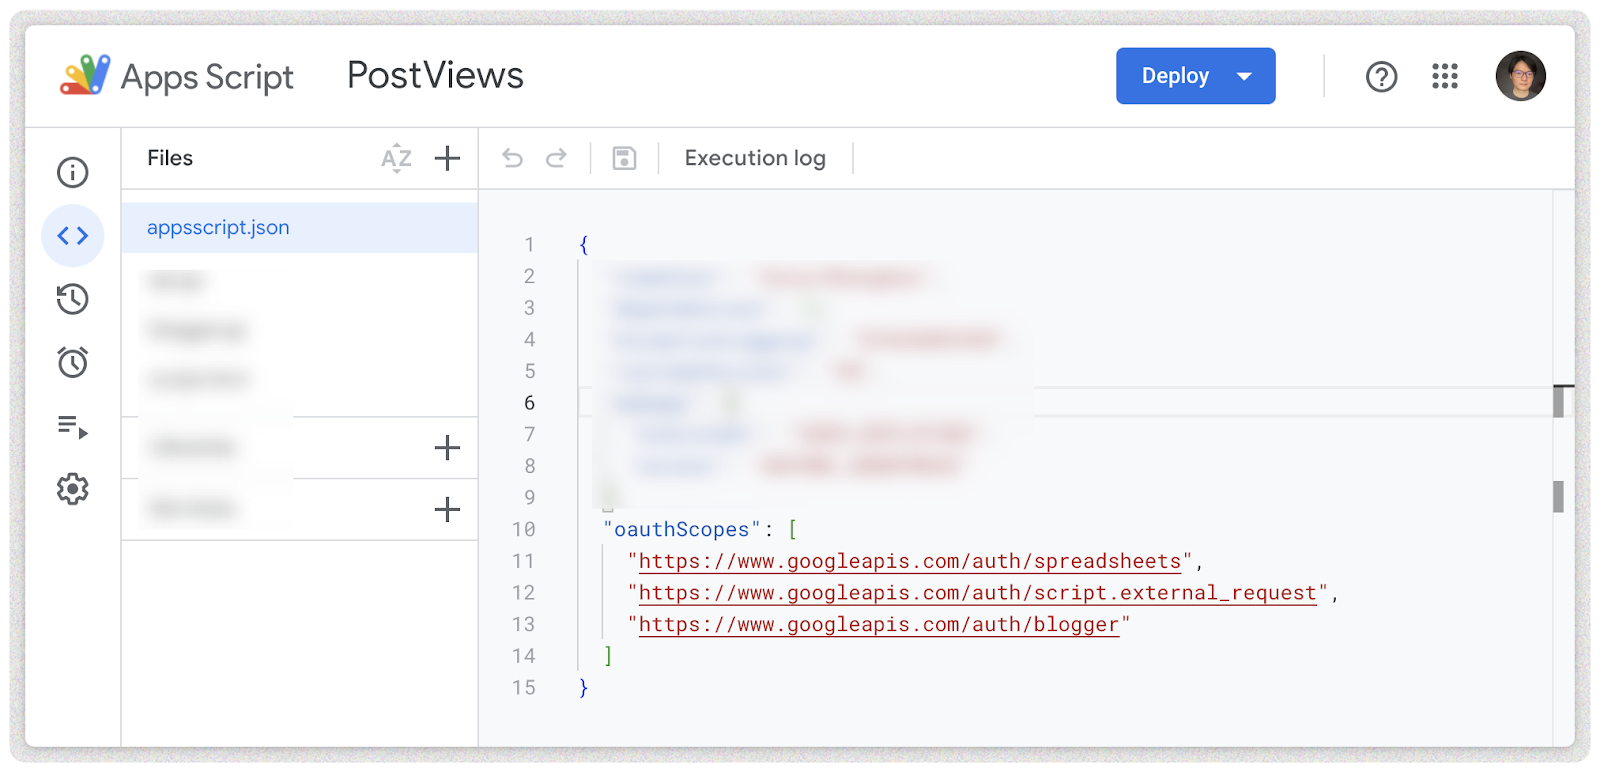
OauthScopes example for using Google Blogger API in the project for Google Sheets.
{
"oauthScopes": [
"https://www.googleapis.com/auth/spreadsheets",
"https://www.googleapis.com/auth/script.external_request",
"https://www.googleapis.com/auth/blogger"
]
}
GoogleAppsScript Playlist
Links

Comments
Post a Comment